Crimson Feature of the Month: Treasury Import
Adrienne | Mon Oct 02, 2023

The Treasury Import feature allows you to import both receipts and expenditures into Crimson. Please note that expenditures and receipts use different Line Numbers for FEC Reports, so please consult the FEC Line Numbers or download the PDF when setting up your file to import. If you are uploading your expenditures from Quickbooks, please consult this guide on how to prep your file.
How to Prepare Your Upload
From Excel or spreadsheet, prepare the file for uploading with the following columns:
Entity Type:* For example, ORG=Organization or IND=Individual. See the Crimson FAQ - Vendor and Payment Type Codes on the HelpDesk for the full list.
First and Last Name or Org Name:* Vendor’s Name. Use the First and Last Name fields for Individuals and Org Name for non-Individual payees.
Entity ID: This field is optional and should be used if the vendor already exists in Crimson. This is suggested to avoid duplicate issues.
Transaction (Txn) Date:* Date the expenditure was made. This date is used to report to the FEC.
Amount:* The amount spent on this expense.
FEC Description:* Description of expenditure that shows up on the FEC report.
Fund Code:* The election cycle and period. Examples: P2022 and G2022. Note: This is for categorization in the database only, there are separate fields, Election Code and Year, for Election CD if you wish to display this on the FEC report.
Bank Account: If you are distinguishing which bank account the expenditure is being made from, then enter the correct code here. If not, then exclude this column and the import will default to “N/A” for this field.
Line No:* Enter the correct line number for the expense. **There is a list of FEC line numbers in our HelpDesk titled FEC Line #’s by FEC Reports.
GL Account #1 - #3:* Enter the breakdown of the expenditure by GL Code here. If you do not use GL Codes, the system will automatically assign an “N/A” code.
How to Use the Treasury Import for Receipts and Expenditures:
1. From the Crimson menu, click on the Treasury dashboard. Then click on the import icon in the navigation bar.
![]()
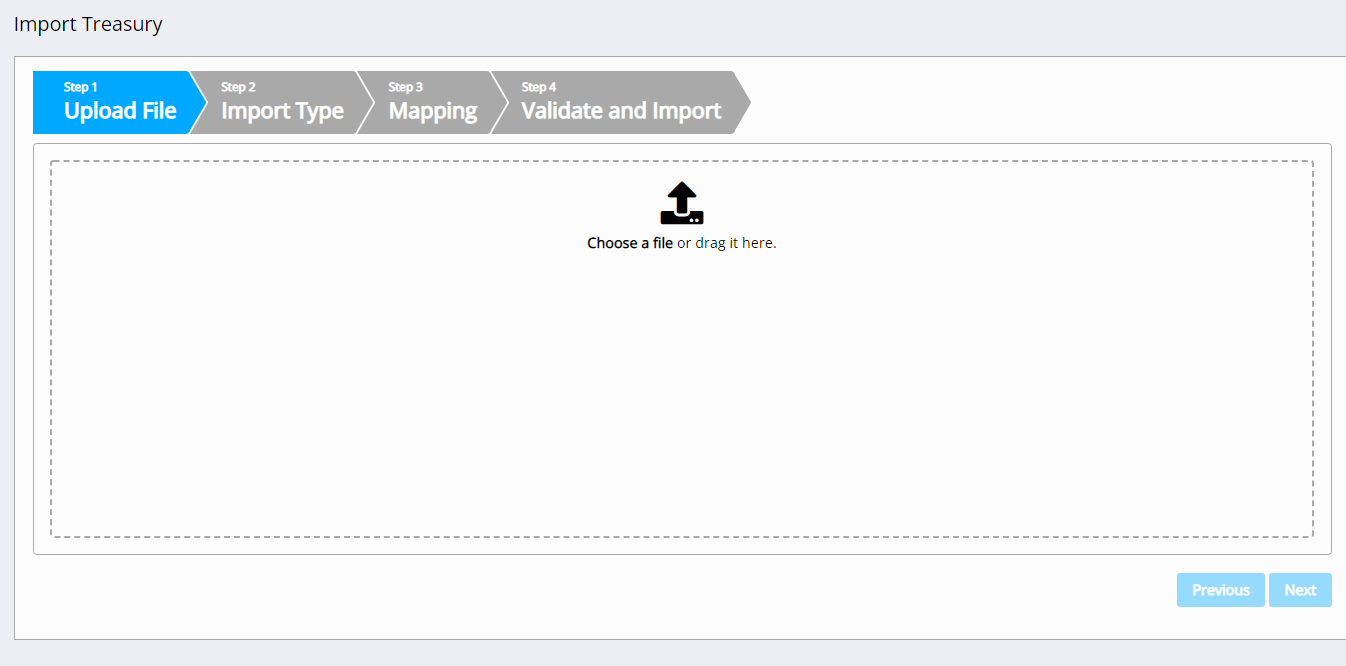
2. The import tool will open. Select the file you want to import by either dragging-and-dropping it or finding the file on your computer.

3. Select the worksheet you want to import. The first few rows should display. Click the

button to move to Step 2.

4. In Step 2: Import Type, select “New Transaction” in the drop-down.
5. Next, select the appropriate options from the drop-down menus. When finished, click
 .
.
Transaction type: choose Receipt or Disbursement
Fund Code: select the correct one in the drop-down
Bank Account code: select the correct account N/A
Line Number: select the type of Receipt for FEC Line Numbers

Note: For importing new payees, select the import type of New Vendor. For more information about importing new payees, see the Crimson 3 – Importing New Payees guide on our HelpDesk.
6. On Step 3: Mapping, map the header fields in the uploaded file to the correct option in the drop-down menu. Click on
 .
.

Note: Transactions imported under New Vendors or Payees only require the Entity Type and Vendor Name fields. While the Address is not required, it will have to be manually entered for each payee at a later day for FEC reporting. We advise adding it at this point to simply reporting in the future.
7. Step 3 includes additional mapping options:

Auto Mapping: Crimson will attempt to auto map the columns in the file to the columns in the database.
Save: Click this button to save this mapping for future use. Options to Save to New Mapping will appear with a space for you to name the mapping.

Load Mapping: Loads previously saved mapping and Delete Mapping deletes any saved mapping.
Reset: Deletes out all mapped fields and start over.
8. In Step 4: Validate and Import, click on the validate button. This will ensure that all required fields and the format are correct. A confirmation message will appear if the import is successful, with how many records were validated and imported. If the import fails, a message will appear with why the validation wasn’t completed. You can go back and fix the error and reload it.

Note: For additional instructions on entering and linking memo transactions, please refer to the guide on the Crimson Helpesk.