Crimson Feature of the Month: Quickbooks Merge in CrimsonFiler
cmdi | Mon Oct 02, 2023

If you use Quickbooks to manage the financial aspects of your campaign or PAC, it only takes a few steps to upload and merge those Excel files into CrimsonFiler. From there, you can use the information to create and file an FEC report.
How to Use the Quickbook Merge: 1. Before opening CrimsonFiler, you need to prepare two different Excel files: one listing vendor information and one for expenditures.
Vendor File: include vendor name, organization type, street, city, state, and ZIP.
Transaction File: include vendor link (vendor name), line number, date, amount, and description.
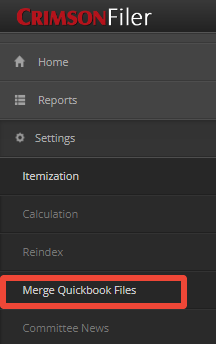
2. Open CrimsonFiler. From the main menu, click on Settingsand then Merge Quickbook Files.

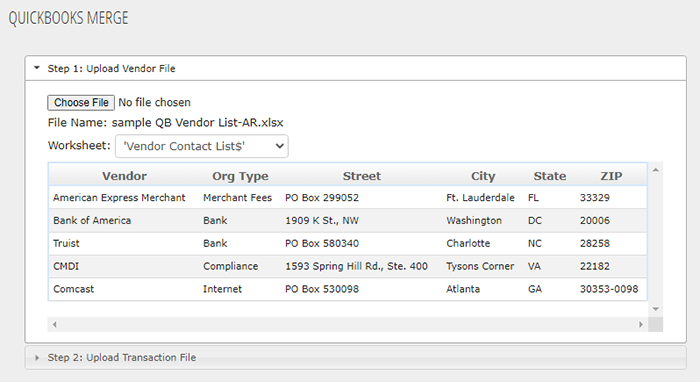
3. Under Quickbooks Merge, select the file containing your vendor information.

4. Select the correct Worksheet in the drop-down menu and the first few rows of data will appear.

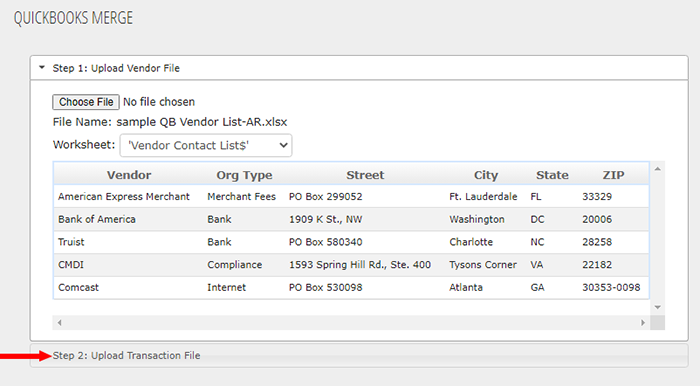
5. Proceed to Step 2 by clicking on the tab underneath the Step 1 bar.

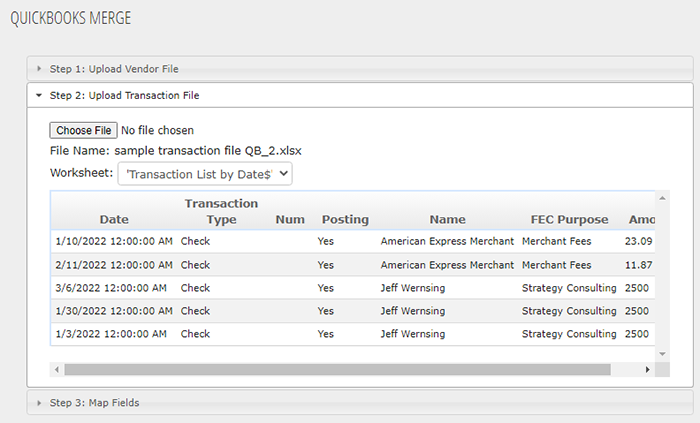
6. Then select the transaction file you want to upload and the correct spreadsheet.

7. In Step 3: Map Fields, match the column in the Vendor File with the Field name. Repeat this with your Transaction File.

8. Click the  button.
9. Click YES when prompted with, “Are you sure to merge now?”
10. A confirmation message will appear. Select OK.

11. Once OK is clicked, a Microsoft Excel file with the merged data will automatically download.

12. Open this file in Excel to separate first and last names from the ORG Name field, add line numbers, and add people types to the spreadsheet.
Note: If you wish to create an FEC report in CrimsonFiler, you can either import the merged file into Crimson or directly import your vendors and transactions into the CrimsonFiler report. Follow the directions under Creating an FEC Report in the Helpdesk.