Crimson Feature of the Month: My Payment Requests
cmdi | Mon Oct 02, 2023
The Payment Requests feature in Crimson is helpful for submitting requests to the financial or treasury departments to pay for a vendor expense, create an expense report, refund the contribution from a donor, or request a contribution be made to another committee. There are two sides to this feature – submitting the Payment Request and Approving, Paying or Rejecting a Payment Request that the financial or accounting teams use. Another post, Crimson Feature of the Month: Payment Requests – Treasury will cover the Treasury side of this feature that allows finance and treasury teams to Approve, Pay, or Reject a Payment Request.
You can also watch a new video tutorial on how to use both My Payment Requests and Payment Requests-Treasury on the Crimson Helpdesk.
How to Use My Payment Requests
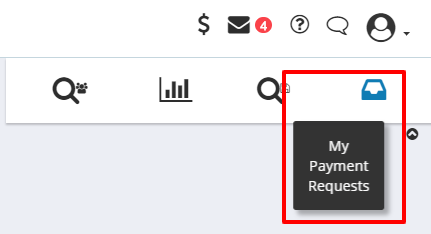
1. Go to the Home dashboard navigation bar and click on the icon for My Payment Requests.
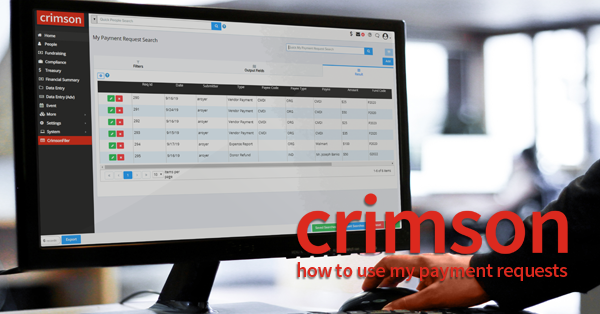
2. The My Payment Request Search will open and list all the open Payment Requests. This search results page operates like other Searches in Crimson. You can adjust Payment Requests filters or sort by clicking on each column header.
1. Use the Quick My Payment Request Search bar to look up a Payment Request by keyword, such as vendor name.
2. Click on the icon
to adjust which column are displayed in the Payment Request Search results.
3. Click on a column name to sort the results by that category.
4. Click on the
to open an individual Payment Request. Click on the
button to delete the Payment Request.
5. Click on the
button to download a CSV of the Payment Requests.
How to Submit a Payment Request
1. Click the
button, located in the top-right corner, to create a new request.
2. Search for existing Payee or Vendor records. As you type, possible matches will display. Select one to begin the Payment Request.
3. If no Payee matches are found, click the
button. A new window will open for you to enter the information for the new Payee including Entity Type, Payee Name, Address, and Description. When you are finished, click the
button. The other fields are optional, and some information may be completed by Treasury staff.
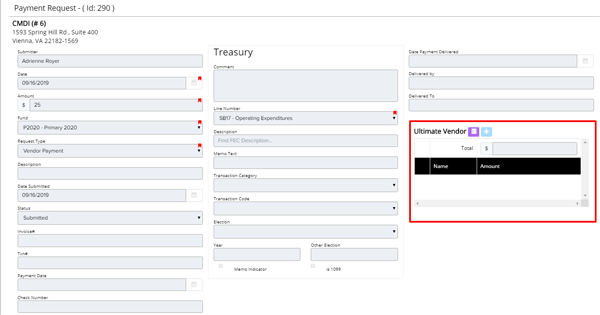
4. Once a Payee is selected, the Payment Request screen appears. The name associated with the Crimson account making the request will be automatically added to the Submitter field. The other fields marked with a red flag are required to be completed: Date, Amount, Fund Code, Request Type.
5. The Request Type field will give you the options of Vendor Payment, Expense Report, Political Contribution, and Donor Refund. Select the appropriate choice.
6. When complete, click
at the bottom of your screen. A green bar should appear with a message that the “Record was saved.”
7. If you need to make changes, click
at the bottom of the screen to make updates to the request before submitting.
8. When ready, click the
button. A confirmation message will appear to ask you, “Yes” or “No.” If you click “Yes,” a green ribbon with a confirmation message will appear. This will update the Payment Request status from “Open” to “Submitted”.
Other status updates may include:
Open – A request is started but not submitted for review. Until it is submitted, only you will be able to see it.
Submitted – Both you and Treasury staff can access the request, but edits can still be made.
Under Review – Treasury staff is currently reviewing the request. Edits can no longer be made.
Approved – Invoice – The request has been approved, and an invoice for payment is pending.
Paid – The payment has been processed by Treasury staff.
Rejected – The request was not approved. You may edit the request and resubmit.
Note: If a Payment Request is rejected, an explanation may be included under the Comment section. The status will appear as Rejected. Please click on the
 button to make changes and then resubmit the request.
Adding Ultimate Vendor Expenses
After your Payment Request has been saved you can add Ultimate Vendor expenses. Ultimate Vendors are transactions you are requesting to be reimbursed by your organization.
1. In your Payment Request, the
button will be faded in the Ultimate Vendor section.
2. Click
to activate it. A darker
button will appear. Click on it to add an Ultimate Vendor expense.
3. Look up the existing Payee or add a new one.
4. The Date, Fund, and Request Type will prefill to match the Expense Report. Complete the Amount and Description fields and click
.
Note: Click
 to continue adding Ultimate Vendor expenses without leaving the entry page.
Adding Attachments
If you need to submit receipts, purchase orders, invoices, or other documents and images with your Payment Request, use the attachment function to upload a file from your computer.
1. Make sure the Payment Request is saved.
2. Click
. An
icon will appear at the bottom of the first column. Click on it.
3. You can either drag-and-drop a file from your computer or select the file to upload when prompted.
4. The name of the file will appear in blue.
Note: A receipt can be attached separately for each ultimate vendor, you can scan and save your receipts together as a single document and attach it to the main Payment Request.
Request a Donor Refund
If you need to issue a refund to a donor, you can use start the process directly from the donor's contribution record.
1. Open the contribution record.
2. Click Request a Refund in the third column.
3. Enter the amount of the refund and click Apply.
4. A confirmation message will appear. Click “Yes.”
5. The My Payment Request Search will open. Select the correct Payment Request and click on the edit button to open it.
6. Follow the directions from above to submit a Payment Request for a donation refund. At that time, the Refund adjustment will be automatically applied to the contribution.
Note: If there is a U1 – Refund Requested Exception Code, it will automatically be changed to U2 – Refund Issued.


