Feature of the Month: Two CrimsonFiler Shortcuts
cmdi | Mon Oct 02, 2023
With the deadline for Year-end 2017 reports approaching, you might need help completing your filings. Here are two features in CrimsonFiler that can make completing your reports easier and faster – the Best Effort Update and the Sync to Crimson features.
Best Effort Update: streamline updates made in Crimson for employer and occupation information without having to make multiple imports into CrimsonFiler.
Sync to Crimson: make edits in CrimsonFiler and then click a button to save them back in Crimson.
Best Effort Update
Use this shortcut if you’ve already imported your data into CrimsonFiler and started to make edits. This feature allows you to return to Crimson and add employer or occupation information without re-importing your receipts into CrimsonFiler and starting over.
1. From the Crimson dashboard access CrimsonFiler and build your Form 3 or 3x report.
2. On the form’s main tab, click on Sched A, which is located near the top.
3. From the Sched A tab, click on the Best Effort Update.
4. A new window will open and ask, “Are you sure to update Employer and Occupation from Crimson now?”.
Note: If you have not yet added this information to Crimson, please add it now. Once you have uploaded and saved it, you can return to CrimsonFiler and complete this step.
5. Click on Yes if the information has been added to Crimson, and you are ready to proceed. Another message will appear with the number of records that have been updated.
6. Click on OK to finish editing your report.
Sync to Crimson
Use this feature if you have edited receipts in CrimsonFiler and need to make those changes in Crimson.
1. From your Schedule A-Receipts, open the receipt that you wish to edit by clicking on the green
button.
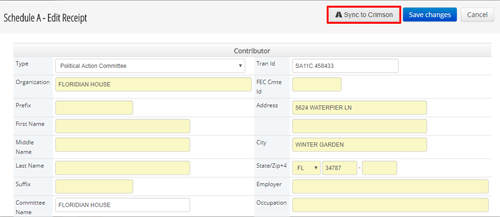
2. Once the receipt is open, make the needed changes and then click on the Sync to Crimson button.
Note: Hover over the Sync to Crimson button, and the fields that can be edited in Crimson will be highlighted in yellow.
3. A window confirming if you want to sync this information will appear. If you wish to proceed, click on Yes.
4. Another message will appear confirming the information was synced.
5. Before you exit, make sure you click the blue
button to save your edits!


